To create an image maker, you will first need Item Images that compose the image.
Check out this page for details on how to create the images you need.
目次 / Contents
Type of images you need
- Item Image (PNG format)
- Item Icon (PNG format)
- Image Maker Icon (PNG, JPG format)
Basically, you will need to prepare three types of images.
All of them are created and uploaded differently, so please read the description below carefully.
Item Image
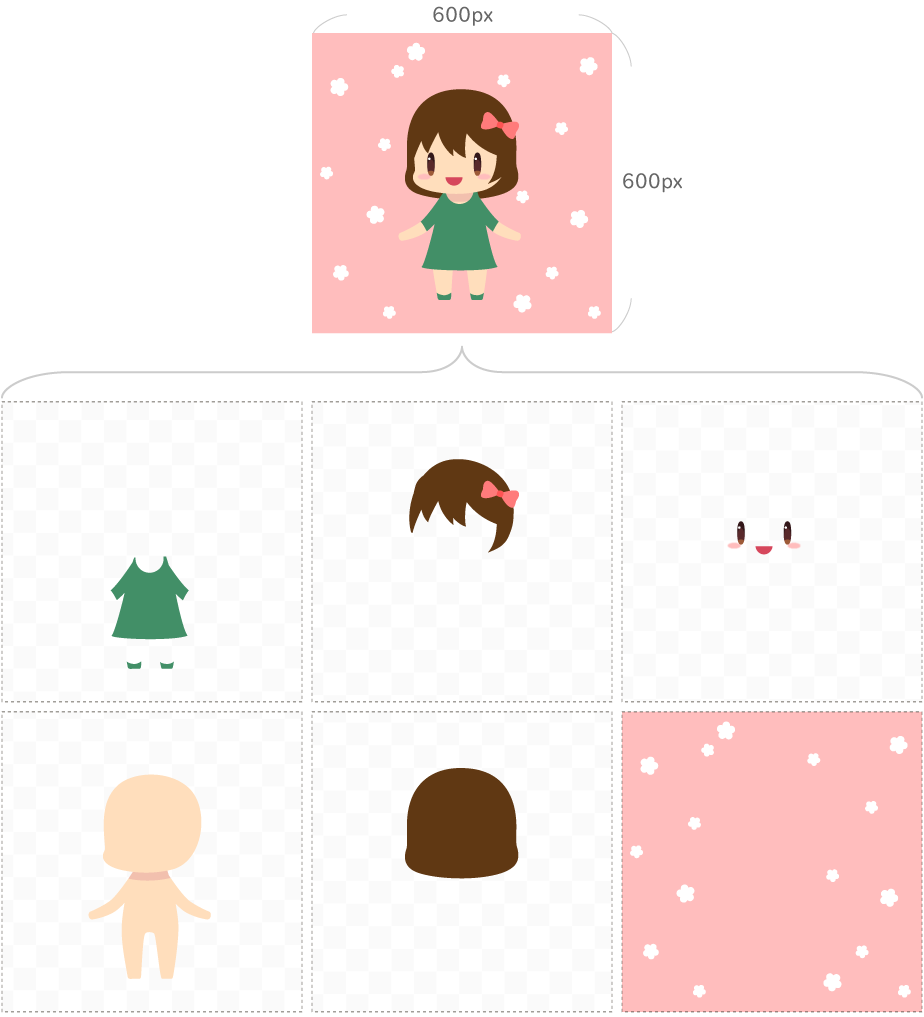
Item Images are combined on the image maker to make images.
The link below will help you calculate the number of Item Images you need to prepare.
【Basics】A step-by-step guide on how to create image makers
In Picrew, the image maker canvas (the area where images are combined and displayed) is
600px × 600px for 1:1
540px × 960px for 9:16.
Therefore, the image should be created based on this size.
Generally, item images are fine if they can be exported at 600px ✕ 600px for 1:1 and 540px ✕ 960px for 9:16.
Just to be safe, illustration software should be used to create illustrations with a canvas size of 600px ✕ 600px doubled to 1200px ✕ 1200px for 1:1 and 540px ✕ 960px doubled to 1080px ✕ 1920px for 9:16, to avoid problems later! If you have a 9:16 canvas size, you can use 540px ✕ 960px.
Suppose you plan to draw the illustrations on an even larger-sized canvas. In that case, we recommend you use canvas sizes that are a multiple of the original size (600px × 600px) so that you can easily calculate the coordinates afterward.
Exporting images on a canvas with different size
You may not have to worry if you use a 600px × 600px sized canvas to export all the parts, but if you use a different-sized canvas, please be careful.
*Keep this in mind especially when using the rotation and zooming functions. Details are explained below.
The size of Item Images should be the same for each part.
Let’s say you have the following items for a Hat Part.
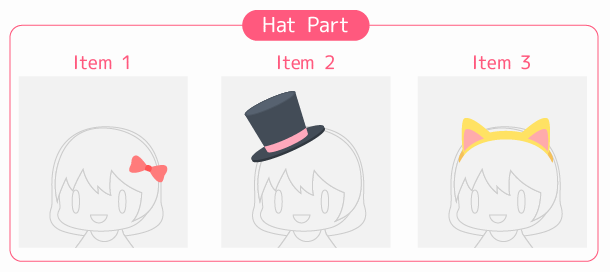
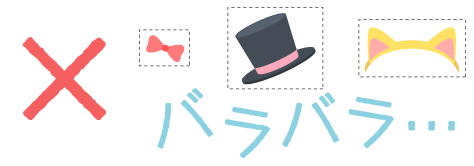
A bad example
As you can see, exporting the Item Images according to their item size means the size of every image will vary.
The reference points for all images in Picrew are set in the upper left corner, which means that different-sized items will be misaligned.
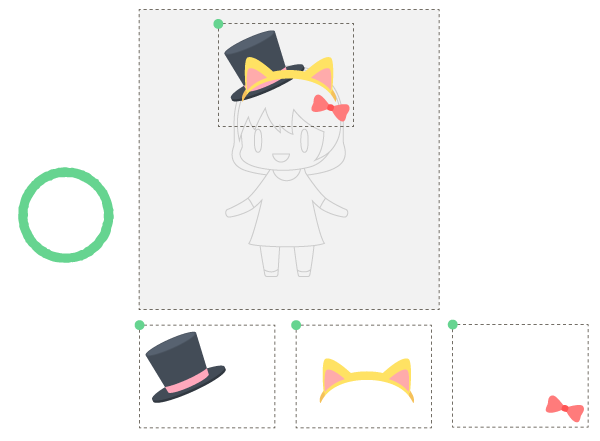
A good example
When you create Item Images, make sure youexport images in a size in which all items of the part fit.
The upper left green circle (●) is the reference point, and the items will be placed exactly where you want them to be.
Using the rotation function
In Picrew, you can set the parts to rotate.
The reference point of rotation is set at the center of the Item Image,which means images created with 600px × 600px may not rotate as you imagine.
What happens when you create Item Images with 600px × 600px
Rotating an Item Image with 600px × 600px will look like the picture on the right.
If you want the ribbon to rotate based on its center, you have to do it differently.
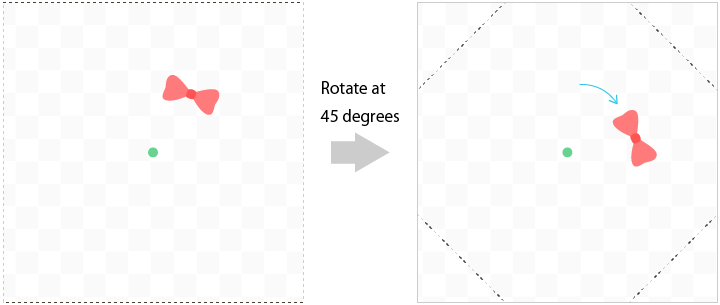
(●): The center point of the Item Image
Dotted line (…): Image size
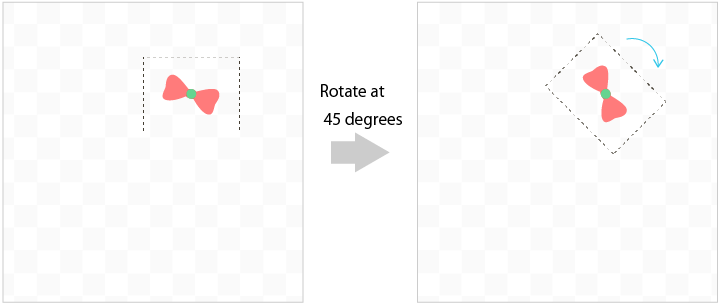
What happens when you export an image based on its center point
Export the image so that the ribbon’s center matches the item image’s center, and the image will rotate exactly how you want it to (see picture on the right.)
As you have already learned, the Item Images must be unified for each part, so if you want to use the rotating function, consider the part’s center point before exporting your image.
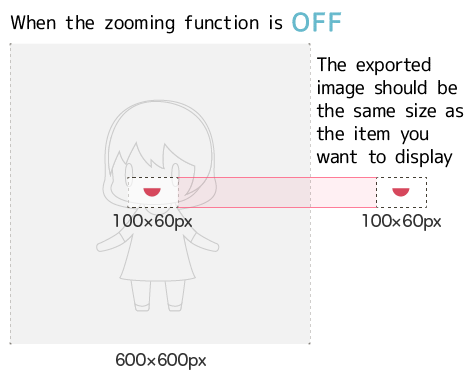
Using the zooming function
To use the zooming function, the Item Images must be uploaded at twice the size.
(*This is to avoid the image from blurring when it is enlarged.)
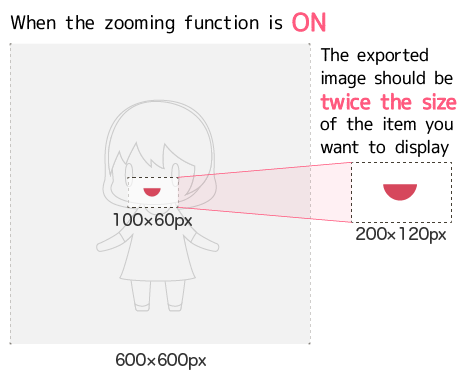
If you create Item Images on a 600px × 600px canvas and want to add the zooming function midway, you will have trouble preparing the double-sized images.
Therefore, as you may have already learned, we recommend you use at least a 1200px × 1200px sized canvas for Item Images.
Please also note that the center of the Item Image is the center point of zooming, just like in the rotation function.So keep the center point in mind before exporting the images.
Item Icons
Item Icons are images used as buttons for selecting items in an image maker.
They should be simple so the players can get an image of what the items are like.
You can use the Item Images as Item Icons by using a function that helps crop the transparent areas and resize the images.
Try using this cropping function to save time from creating Item Icons for every item.
If you are making a Random Maker, you don’t have to create or upload Item Icons because the items will be selected randomly (and not by the players)
Image Maker Icons
Image Maker Icons are images that are displayed on Picrew’s top page.
You can leave them for later since Image Maker Icons are not necessary to operate image makers.
The design should be simple and easy to understand so the users can get an idea of what your image maker is like and what kind of images can be created.